Wednesday, December 15, 2010

Knitted Gifts

The holiday season is whipping up quite quickly!  This year as always......good intentions and  a fair bit of follow through.  I did manage a few knitting projects to pass on to unsuspecting friends and neighbours.  I've been waiting patiently for a special holiday knitting edition from Interweave Press to show up at my local magazine shop this year....but finally gave up.  Instead, I searched the internet to find which knitting books were new and interesting looking and then......I did a search for them in my local library.  I was pleased to find that they had what I was looking for and went to check them out.  One of my favourite finds this year has been Joelle Hoverson's 'More Last Minutes Gifts'.  The patterns were nicely organized into the time required to compete each project.  I found myself making two projects from the book......an easy 2X2 rib hat (made three of them) , and some adorable pointy elf hats in pretty pinks and cream as well (made 5 of them...almost addictive).  In all I've made 10 hats in the last little while!  Oh and also as you can see in the photo above....I made the Hermione Cable Hat from the Charmed Knits Book.  Next I'm going to try the sock pattern from More Last Minute Gifts....it looks straight forward.....and a nice little project for the airplane......and as well I'm working on a little sweater for my son.....hopefully finished before Christmas.
If you are looking to make some last minute knitted gifts....see if you can find 'More Last Minute Gifts' in your library or book store....but if that's not possible here are some links to some free patterns that are quick and cute....in my opinion.

Tuesday, December 14, 2010

A Daring Eggs Benedict

This month when the Daring Cook's proposed making Eggs Benedict.....I was pretty excited.  It was an opportunity to try poaching eggs directly in water which is something I've never before bothered to do.....and to make Hollandaise Sauce from scratch....something else I had never before bothered to do.  I can tell you that I was even more pleased with the results than ever I thought possible.  It was delicious.  And the most difficult part of the whole process was not licking the Hollandaise bowl clean when it was all done.  I did decrease the Hollandaise recipe a bit using two instead of three egg yolks and it was the perfect amount to make 5 eggs.  The recommended water temperature for poaching was 190F and again my handy Thermapen saved the day......I highly recommend them.  While this may have been one of the simplest challenges....it may well be my most favourite as it had me try something I never had.....it was easier than I'd thought.....and it was far more delicious than I ever imagined.  So....I'll be trying this one again and again.
Jenn and Jill have challenged The Daring Cooks to learn to perfect the technique of poaching an egg. They chose Eggs Benedict recipe from Alton Brown, Oeufs en Meurette from Cooking with Wine by Anne Willan, and Homemade Sundried Tomato & Pine Nut Seitan Sausages (poached) courtesy of Trudy of Veggie num num.

Eggs Benedict
Ingredients
4 eggs (size is your choice)
2 English muffins*
4 slices of Canadian bacon/back bacon (or plain bacon if you prefer)
Chives, for garnish
Splash of vinegar (for poaching)
For the hollandaise (makes 1.5 cups):
3 large egg yolks
1 tsp. (5 ml) water
¼ tsp. (1 ¼ ml/1½ g) sugar
12 Tbl. (170 g/6 oz.) unsalted butter, chilled and cut in small pieces º
½ tsp. (2 ½ ml/3 g) kosher salt
2 tsp. (10 ml) freshly squeezed lemon juice
Pinch cayenne pepper (optional)
* for gluten free, use gluten free English muffins or bread of your choice
º for dairy free, use a dairy free margarine
Directions:
1. Fill a medium saucepan halfway with water and bring to a simmer.
2. Cut the chilled butter into small pieces and set aside.
3. Whisk egg yolks and 1 tsp. (5 ml) water in a mixing bowl large enough to sit on the saucepan without touching the water (or in top portion of a double boiler). Whisk for 1–2 minutes, until egg yolks lighten. Add the sugar and whisk 30 seconds more.
4. Place bowl on saucepan over simmering water and whisk steadily 3–5 minutes (it only took about 3 for me) until the yolks thicken to coat the back of a spoon.
5. Remove from heat (but let the water continue to simmer) and whisk in the butter, 1 piece at a time. Move the bowl to the pan again as needed to melt the butter, making sure to whisk constantly.
6. Once all the butter is incorporated, remove from heat and whisk in the salt, lemon juice, and cayenne pepper (if using).
7. Keep the hollandaise warm while you poach your eggs in a thermos, carafe, or bowl that you’ve preheated with warm water.
8. If the water simmering in your pan has gotten too low, add enough so that you have 2–3 inches of water and bring back to a simmer.
9. Add salt and a splash of vinegar (any kind will do). I added about a tablespoon of vinegar to my small saucepan (about 3 cups of water/720 ml of water), but you may need more if you’re using a larger pan with more water.
10. Crack eggs directly into the very gently simmering water (or crack first into a bowl and gently drop into the water), making sure they’re separated. Cook for 3 minutes for a viscous but still runny yolk.
11. While waiting for the eggs, quickly fry the Canadian/back bacon and toast your English muffin.
12. Top each half of English muffin with a piece of bacon. Remove the eggs with a slotted spoon, draining well, and place on top of the bacon. Top with hollandaise and chopped chives, and enjoy!

Sunday, December 12, 2010

A Month of Cookies-Whipped Matcha Shortbread Cookies-18

Christmas baking would not be complete without a little shortbread.  I have this recipe for whipped shortbread that I really love.  It is light from all the whipping and if you catch them before they brown......perfect in every way.  The trick is to catch them at the very first sign of browning.  With the addition of Match powder to the recipe this is a little more tricky than without due to the strong colour addition.  This batch is a hint more browned than I would like...following batches will be baked 1 minute less.  It can be tricky too using a cookie press as the temperature of the dough is critical.  Ideally you should bake one cookie to calculate out the required baking time before baking a whole sheet of cookies.....but as you can see I am lazy.  If your house is very warm, the dough can quite easily become too soft.  A few minutes in the fridge solves this problem however......and if you are finding it all too frustrating....you can just roll them in balls and flatten them with a fork.  I found the dough almost impossible to stop eating with the Matcha powder added....YUM.
Perfect Whipped Matcha Shortbread Trees
1 lb butter, room temperature
1 cup icing sugar (confectioners)
pinch of salt
1 tsp vanilla
1/2 cup corn starch
2 1/2 Tbsp Matcha Powder
3 cups flour
Preheat oven to 350F.  Cream the softened butter, icing sugar, vanilla and salt until creamy.  Add matcha powder and mix in.  Add corn starch and beat in with electric mixer. Add in flour 1 cup at a time beating with electric mixer between additions.  Beat until fluffy....about 3-5 minutes with electric mixer.  Put dough in a cookie press and press desired shapes onto cold cookie sheet.  Bake about 5-7 minutes for cookie press shapes or longer if you are rolling and flattening balls of cookie dough.  Stop baking at the first hint of browning.  Let set two minutes on the cookie sheets before removing to wire racks to complete the cooling.

Thursday, December 9, 2010

A Month of Cookies-Fruit Cake Cookies-17

Now I know the idea of Fruit Cake does make some people groan.....I am one of those people.  ......but I had these cookies last year at a holiday get together and found them to be surprisingly delicious.  So much so that I was compelled to ask for the recipe.....which is something I don't do very often.  They are not overly fancy to look at, but do have some festive colour in them from the glazed fruit.  Even if you despise fruit cake....you might just love these as much as I do.  As an added bonus, they taste better after a few days....making them an excellent choice for gift giving! 
Fruit Cake Cookies
2 cups mixed glazed fruit
1 cup raisins
1 cup dates, chopped
1 cup pecans, chopped
1/2 cup flour

1/2 cup margarine, softened
1 cup sugar
2 eggs
1 tsp vanilla
1 cup flour
1/2 tsp baking soda
1/4 tsp cinnamon
Combine first 5 ingredients and toss until fruit is coated in flour and all fruit pieces are separate.  In a large bowl, cream the butter and softened margarine until creamy.  Mix in eggs one at a time, then add vanilla and stir in.  Stir in baking soda, cinnamon, and finally the second amount of flour.  Pour the flour coated fruit into the creamed mixture and stir well to combine.  Drop in 1 1/2 tablespoon sized amounts onto nonstick cookie sheet and bake at 350F for 8-10 minutes or until cookies are golden brown in spots.  Let sit on cookie sheet for a few minute before removing to a wire rack to completely cool.

Yeah Val!

Congratulations to Val with comment #45.  Have a look at her blog for some great crafting and a yummy recipe for potato boats!  Yeah Val!  Buy your self something nice for Christmas with your $65 gift code.  I will email you the information you'll be needing to use it. 

Random Integer Generator

Here are your random numbers:
45
Timestamp: 2010-12-10 00:13:36 UTC

Thanks to everyone for stopping by and playing!  It was interesting to learn your favourite Christmas foods!!

Sunday, November 28, 2010

Favourite Things Giveaway ....While I have some Crostata

This contest is now closed.  Thanks to all who entered!
With Christmas preparations well under way....(doesn't it just look like Christmas here???) what a perfect time for another giveaway!  Those wonderful folks over at CSN have offered to sponsor another giveaway here.  This one is for a $65 gift code that can be used at any of their 200+ stores and can be delivered to any US or Canadian address. Please take a peek at some of their stores which offer anything you can think of from Bathroom Furniture to gorgeous Kitchen Wares and all points in between.  There are so many options.....I'm just going to take a piece of Pear & Blue Cheese Crostata from this month's Bakers Challenge to sustain me through the hours of window shopping at CSN.  So please feel free to enter for your chance to win a $65 gift code for some fine CSN shopping.

The Details
  1. This Giveaway is open to anyone with a US or Canadian mailing address, as CSN will ship to either location.
  2. To enter the draw for the $65 gift code from CSN please leave a comment at the bottom of this post telling me your favourite holiday food.  Is it the turkey???  The stuffing??? Steamed pudding???  I'm curious.....so tell me!
  3. You can enter one time by leaving a comment on this post......and you may leave one additional comment on this post if you are a follower......mentioning that you are a follower of this blog. (a way to say thank you to you super nice followers)  so that is a maximum of two entries.  
  4. Make sure that there is a way for me to contact you should your comment be chosen.  Either leave your email address written in the form jane(dot)doe(at)hotmail(dot)com (so you don't attract spam) or make sure that your blogger account etc. has an email address in it that I can access.
  5. The winning comment will be selected using a random number generator at the end of the day on Wednesday December 8th.
  6. The winner will be contacted by email on December 9th.  If the winner cannot be contacted within a few days.....a new winning comment will be selected.....so please leave your contact information.
  7. Please do not leave links to other businesses within the comments.
This Month's Challenge.....Crostata....that's pie!
Now have a quick look below to see the recipe from this month's great Baker's Challenge.  The 2010 November Daring Bakers’ challenge was hosted by Simona of briciole. She chose to challenge Daring Bakers’ to make pasta frolla for a crostata. She used her own experience as a source, as well as information from Pellegrino Artusi’s Science in the Kitchen and the Art of Eating Well. Using the pastry recipe provided by Simona we were permitted to find a filling that appealed to us.......I chose to make a rustic pie baked on a cookie sheet with the edges folded in......and pear and blue cheese sounded intriguing to me.

Pear and Blue Cheese Crostata
Filling
4 small to medium pears, cored and chopped
3 tbsp crumbled blue cheese
1/4 cup flour
1/4 cup golden sugar
1/4 cup chopped walnuts or pecans
3 tbsp cold butter, cut in small pieces
honey, to drizzle on top

Preheat oven to 450F.
Set cut pears aside.  Roll pastry out into a 12 inch circle, and transfer onto a parchment lined baking sheet.  Spread pears over the middle of the pastry leaving 1 1/2 inch uncovered at the edges.  Scatter crumbled cheese over top of the pears.
Combine the flour, nuts, and sugar. Pinch in the butter until it is like a crumble.  Pour this topping over the pears and cheese.  Fold in the outside edges to make a circle.  Bake for 25-30 minutes until crust is golden brown.  Allow to cool for 10 minutes.  Drizzle with honey just before serving.

Sunday, November 21, 2010

Top 10 + Kitchen Gadgets- For Christmas

With the gifting season fast approaching, the influx of colourful flyers into our house is enormous.  There are so many purchasing options out there.  And for me at least, it seems that quite often now....my best chance of getting the item I'd like at the best price (or at any price in some instances) is online.  If you have a foodie in your life and are perplexed as what on earth to buy for them........maybe I can offer a few suggestions.  Here are a just few things that I have found either indispensible.....handy or otherwise just plain cute, and now consider them to be on my 'must have' or at least my 'would like to have' list.
  1. A proper chef's knife. ($75-$150) If you don't want to spend ridiculous amounts of money....just get a good 8 inch chefs knife....you don't need to go out and buy a whole set.  There is very little more annoying than trying to prepare food with poor quality knives, and a basic 8 inch chef's knife is the very least you should need and will get you though the majority of your knifely needs.  In subsequent years you might like to broaden your collection and pick up a bread knife, smaller utility knife, filleting knife....you must think about the tasks you are most likely to do to determine the best choices for you.  While my knife block holds 7 knives, I find that I predominantly use 3 of them.  The 8 inch chef's knife, the 8 inch fillet knife and a 7 inch carving knife.  You should be able to pick up an 8 inch chef's knife for about $120 (in Canada....likely cheaper in the US). Places to look are, department stores like, Sears, The Bay, Home Shops, Kitchen specialty shops, Knife specialty shops or online......or even eBay. Brands to consider include Henckels or Wusthof.  If you choose to purchase online....take the time to go into a store and handle the knives you are considering.....it's good to make sure it will live up to your expectations.  If you find out the following year that the knife that you so thoughtfully gifted is being mistreated.....(ie stored in a drawer instead of a proper knife block or God forbid not being sharpened).......please rescue it and bring it to a good home. Keep in mind that some people have superstitions about giving or receiving knives as a gift so they include a penny along with the knife for the receiver to give the penny back "to pay for the knives"....so then they are not a gift.  As an alternative for a much less expensive knife....have a look at the Victorinox Fibrox....well rated and very popular in commercial use kitchens.
  2. Stainless steel measuring spoons and dry measure cups.  Everyone should have these....they are not expensive and will last a lifetime.  If you can find narrow measuring spoons like these they are super handy for measuring out of spice jars. You should be able to find these in any kitchen shop for about $15.   Places like Winners or HomeSense or TJ Max are good places to look.
  3. The Zyliss garlic press.  If you cook with garlic (we use a lot) you will wonder how you lived without one.  They are inexpensive at about $15 and do look for the one with the matte finish that is dishwasher safe.  One of my best buys ever!  It's easy to use and easy to clean......you just pop an unpeeled garlic clove into the hopper and squeeze.  Readily available at kitchen stores and department stores.
  4. Silicone Spatulas.  Very useful and safe with your non stick cook wear.  Look for ones that fit well in your hand....not one with sharp or angular contours.....and stay away with ones with wooden handles if you are planning to wash these in the dishwasher.  I am now, after at least 10 years looking to replace my le Creuset ones as they no longer fit tightly to their (removable) handle.  Plenty of inexpensive and fun looking options out there for under $10.  Try looking in places like Winners or TJ Max for the best deals.
  5. A stand mixer.  ($250-$400) If the person you are buying for likes to bake.....they will love one of these! Perfect for cookies, cake batters, dough, whipping cream or egg whites..... My DH bought me one of these several years ago and I believe I've more than got my monies worth out of it. I can only comment on the Kitchen Aid models.  I have the Kitchen Aid Ultra Power 300 watt model with the tilting head and 4.5 quart bowl.  For regular batch baking or even a double batch of cookie dough, this is a good size. The best deals that I have seen for Kitchen Aid Stand mixers have been at Costco and on the Home Shopping Channel. Costco sells the larger 5.5 quart drop down bowl mixer with 575 watt motor for $399 in Canada or $299 in the US.  Several times per year it is on sale for $100 off here.....and near Christmas time is one of those times. The Costco unit differs from mine in that it has a larger motor......a larger bowl.......and rather than having a tilting head.....it has a drop down bowl. (If you are from the US......now might be a good time to pick one up as they are on sale right now for $250 plus $15 S&H.)  My preference is for the appearance and stature of the tilting head model as it fits under my cabinets where the larger unit would not.  Also I much prefer the tilting head for the convenience of changing attachments rather than the drop down bowl which creates a congested space in which to change beaters.......it doesn't drop down quite enough to offer a lot of free space to get your hands in. That being said I ....could get over the bulky appearance and awkwardness of the drop down bowl for the extra watts and larger capacity.  I have, on more than one occasion feared for the life of the motor on my unit when mixing a heavy dough.......and I am a fairly moderate baker.  Note that Costco has $100 off right now on the Cuisinart stand mixer with a 1000 watt motor...The Cuisinart model might be worth a look.
  6. Digital Kitchen Scale. ($15-$60)  I originally purchased myself a kitchen scale for weighing parcels for mailing over seas.  If you understand the price structuring of Canada Post and do a lot of overseas shipping.....then you understand how useful your own scale is to own.  Since I have one of my own......I have over time discovered how handy they are for measurement for recipes as well.   If the person on your Christmas list gets a lot of recipes off the internet....then this might be a handy tool for them.....no more guessing how much 200g of sugar might be.  Inexpensive and useful once you get used to using it.
  7. Instant read thermometer.  ($15-$100) After watching countless hours of America's Test Kitchen......my mother became sold on the idea of owning a Thermapen......and to my good fortune she gifted one to me as well.  No more worries about knowing exactly when something is 'done'.  It has been extremely useful for cooking meats, sauces, candy, and even bread.  Bread was always the one that I could never get just right since I don't make to so often that I have a feel for it.  Well....for white bread.....it's done at 200F.....and a little poke with the Thermapen and the wondering is over!  There are a few models available and it is most easily found ( at least where I live) online.  There are also some on eBay right now for a good price.....some are the latest model which prices out at $96 plus S&H straight from Thermoworks  and there are a few of last years model which are only 1 second slower in reading...but with a much improved price...have a look. (the image shown is the latest model....But I think the auction is for the older model....still an awesome price)  And this is the best price I've seen on the latest model.  If that seems a ridiculous amount to pay for something that you are not quite sold on the virtues of.....then there are some less expensive ones to choose from (under$20) as well.
  8. A Bamix immersion hand blender. ($139-$300) I purchased a Bamix just before my son was born.  I'd seen them in home shows and been impressed with their power.  Want to make your own peanut butter, whip skimmed milk for a no fat substitute to whip cream,  make your own frozen fruit sorbet instantly, make idiot proof mayo, instant smoothies, make your own puree or baby food, puree soups in the pot........this is the right tool for the  job.  Solidly constructed....will last your life time! Easy to use......crazy easy to clean!  Look for them at home shows, and online kitchen sales and on places like eBay........if you're super lucky....in a garage sale:)....although perhaps not the best source for gift giving.
  9. Kitchen Cuteness is all over the internet if not in your local kitchen supply store. ($10+) M cups Matryoshka Doll measuring cups by Fred were much cuter than I could resist...you might feel the same:)  Or these condiment bottle caps  over at Perpetual Kid might be up your alley if you are looking for something a little silly.  Perpetual kid is well worth a look around in either event.  And you could pretty  much buy me anything made by Pylones......and I would love it. They make gorgeously frivolous items for those who already have all that they need.  You really must go and check them out.....every time I go to Toronto I stop in at William Ashley China shop and inevitably pick up another Pylones item from their kitchen section.  The first piece of Pylones merchandise I ever saw was their toaster.......very cute!  They make a beautiful hot thermos as well, which Star Bucks has carried at times....you can often get these out of season at excellent pricing.
  10. Cup-A-Cake Holders ($5+)  I cannot even remember where I initially saw these.....I think it was in a kitchen shop in Vancouver 2 or 3 years ago.  Well I finally caved in and bought some for myself.  They are absolutely the perfect thing for carrying a cupcake safely in your lunch without so much as a smoosh to the icing.  The individual plastic cupcake holder opens hinged like a book with a spot reserved for your special cupcake.  Plastic prongs catch the cupcake just above the paper liner's edge so that your cupcake will not move inside it's protective cocoon.  We have been using them for a few weeks now for lunches and just love them to bits.  The hinge is plastic......so I think it's only a matter of time before that part fails.......but I bet it takes a few years.  Best prices on these were found directly from the Cup-A-Cake people, but you can find them on eBay as well.
  11.  Cook Books. ($10+)  As a last suggestion.....cookbooks are nice to curl up with with a cup of hot cocoa.......There are lots of online options with plenty of time for delivery and in many case free shipping....have a look at some of these. And if someone you like...likes America's Test Kitchen...Like I do...then might I suggest ....this book.
  12. I could go on and on....but that's for another post.....
I hope you find some useful suggestions here........and there is still plenty of time before Christmas.......So let's not leave it to the last minute! Happy Shopping!  Stay tuned as there is a Give Away coming very soon (tomorrow if I get it all together) which just might help you in the purchase of some of the above mentioned gift ideas.

Monday, November 15, 2010

Baking Day Cinnamon Buns

Yesterday was a huge day of baking......sometimes that's just how things work out.  I needed to get my Daring Cooks Challenge out of the way (and I was pretty excited to make and eat my first souffle)......I needed to use up some more cream cheese......so I made some more Chocolate Cheesecake Cupcakes........and someone has left a comment saying that they used the Air Bun recipe to make Cinnamon Rolls.......So I just had to give that a try too!  Needless to say, we did a lot of sharing with the neighbours.  And......I'm happy to report that the Air Bun recipe did make fantastic cinnamon buns.  If you'd like to try a batch......go here for the bun recipe and fill with the Filling Recipe below.
Cinnamon Bun Filling
1/2 cup softened butter
1 cup brown sugar
2 tsp cinnamon
1/4 cup chopped walnuts or pecans (optional)
1/4 cup raisins (optional)

Mix first three filling ingredients together and cream until smooth.  Pop it in the microwave for just a few seconds if it isn't going to be easily spread....careful not to melt it though.....just to soften.  Add optional ingredients and set aside.  Move dough to counter and roll out 10"X20" in as much of a rectangle as you can.  Spread filling and roll up along long edge so you have a 20" long roll.  Slice with a sharp knife into 12 -15 equally sized rolls and set in a pan to rise.  Let rise in a warm place for 30- 45 minutes until doubled in size.  Bake for about 20  minutes at 350F or until internal temperature reaches 200F.  Remove to rack and cool slightly before icing.

Cinnamon Bun Glaze
1/4 cup butter melted
2 cups icing (confectioners) sugar
1 tsp vanilla
2 tbsp hot water
Mix melted butter, powdered sugar and vanilla until mixed in well.  Add water 1 tbsp at a time while beating...just until the glaze reaches a spreading consistency....Spread over slightly cooled rolls.

Sunday, November 14, 2010

Back with a Daring Cheese Souffle

I was a little sad to miss out on last months Daring Cook's and Baker's challenge...but things were really just too hectic to do them.  But I am back at it with this month's daring cooks Challenge.  There is lots on the go here as always seems to be the case....it's actually a very busy day of baking here as I will post about later.  But for now...here is the November Cook's Challenge.
Dave and Linda from Monkeyshines in the Kitchen chose Soufflés as our November 2010 Daring Cooks’ Challenge! Dave and Linda provided two of their own delicious recipes plus a sinfully decadent chocolate soufflé recipe adapted from Gordon Ramsay’s recipe found at the BBC Good Food website.

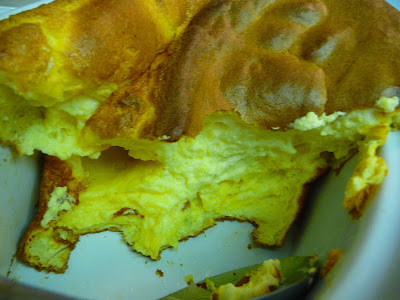
Now I was pretty excited to learn that the November Challenge was to make a souffle.  This is my first and hopefully not my last attempt at a souffle.  It was the perfect accompaniment for a lunch with the early winter weather we have been having. I  wavered back and forth on what kind of souffle to make....and in the end decided to make a basic cheese souffle to start out with.  There seems to be no end of sweet baking going on here so a savoury concoction was most definitely in order.  We had the souffle for lunch this afternoon with a nice bowl of tomato soup.  I chose to try a recipe off the internet from Alton Brown.
Cheese Souffle
2 Tbsp parmesan cheese
1 1/2 oz or 3 Tbsp butter
3 Tbsp flour
1 tsp dry mustard
1/2 tsp garlic powder
1/2 tsp salt
pinch of cayenne pepper
1 1/3 cup hot milk
4 egg yolks
6 oz sharp cheddar cheese
5 egg whites (room temperature)
1/2 tsp cream of tartar
Grease an 8 inch souffle pan with softened butter and coat with grated parmesan cheese, by dumping the cheese in to the greased pan and turning the pan.  Preheat oven to 375F (you will be using only the very lowest rack in the oven).Heat butter and add flour, dry mustard, garlic powder, salt and cayenne pepper to make a roux.  Cook 2 minutes.  Whisk in hot milk and bring to bubble for two minutes.  Remove from heat.  In a small bowl, lightly beat the egg yolks and temper them by beating in a few tbsp of hot roux into them.  Pour egg yolk mixture into the roux and whisk constantly.  Add grated cheddar and whisk to incorporate.  In a large bowl whip egg whites and cream of tartar to firm peaks.  Add 1/4 of the egg whites to the roux base and fold in well.  Add the remaining egg whites in thirds, folding gently.  Fill pan to within 1/2 inch of top making sure edges are clean and buttered.  bake 35 minutes until cake tester poked into the center comes out clean.


Thursday, November 11, 2010

A Month of Cookies-Something Different for the Cookie Tray-16

When gathering recipes for your holiday cookie offering, it's nice to have some drop cookies, some shaped cookies, and some rolled cookies.  I also like to throw in some of these Chocolate Cheesecake Cupcakes in the mini muffin size as shown above.......since: 1) I love them.....2)They are quick to make ...3)They freeze well...4)Did I mention they are delicious??
Now, I make these so often I'm sad to say that the recipe is pretty much committed to memory.....and if you try them....I bet you'd love them too!  These ones are on their way to the Remembrance Day ceremonies here in Prince George.  Ike is excited to take part in the parade with all the other Cub Scouts even though I doubt he can fully grasp it's significance.  So just in case I've convinced you to try them....here is it......the recipe.
Chocolate Cheesecake Cupcakes
1 1/2 cups flour
1 cup sugar
1/4 cup cocoa
1/2 tsp salt
1 tsp baking soda
1 tsp vanilla
1 tsp vinegar
1/3 cup oil
1 cup water
Dump all of the above into a large bowl and whisk together, set aside while making topping

Topping:
1 ( 8 oz pkg) of cream cheese at room temperature
1 egg
1/3 cup sugar
1 cup chocolate chips
pinch of salt

Cream together the cream cheese and sugar, add egg and salt and combine till smooth.  Stir in chocolate chips.
Preheat oven to 350F.  Line 18 muffin tins with paper liners.  Divide chocolate batter equally into each of the 18 muffin cups.  About a rounded tbsp for each.  Top with a rounded tsp of cream cheese topping. Bake for about 18 minutes or until the cream cheese topping begins to brown in a few spots.

Monday, November 8, 2010

A Month of Cookies-Chocolate Cherry Chip Drop Cookies-15

Cookie #15, is submitted for your consideration by my very own Ike.  Ike made and entered these cookies into a little fall fair close by our neighbourhood.  He has been entering cookies and other items into this fall fair for four years now, and this is his 3rd first place cookie submission.  It is not clear from the photo, bur they are a chocolate drop cookie filled with white chocolate chips and dried tart cherries.  They are soft, chewy and chocolaty.....all very good qualities for a cookie....I think.  If you like chocolate cookies....this might be just right for you!  Give them a try......Ike thinks you'll like them.  Ike sold 100 of these cookies along with about another 100 Ginger Sparkles at a cookie stand this summer to raise money for Cub Scouts outtings.

Chewy Chocolate Cherry and White Chip Drop Cookies
1/2 cup plus 6 tbsp soft butter
1 1/2 cups white sugar
2 tbsp molasses
1 egg
1 tbsp vanilla
1 tsp salt
1 tsp baking soda
1 1/2 cup flour
1/3 cup cocoa
1 cup dried cherries
1 cup white chocolate chips
Cream butter and sugar. Add molasses, egg, vanilla, salt and soda.  Mix in flour, cocoa, and cherries and chips.  Drop by teaspoonful and bake at 375F  for 8 minutes.

Sunday, November 7, 2010

A Month of Cookies-Cherry Chip Oatmeal Drop Cookies-14

Since I didn't get to finish up the October cookie submissions....like I'd planned to.......I decided I'd just put them in when I can.  Cookie #14 is a tasty and chewy oatmeal cookie.  I thought I'd better grab a photo of them before they are all gone.  You can double the batch if you'd like.....which might not be a bad idea if you're doing cookie exchange.  A double batch makes about 100 cookies.   They are also a nice nut free option for sending into a nut free school.  I really liked the flavour combination of the dried Montmorency cherries and the chocolate chips......and even though oatmeal cookies are not my favourite.....I actually liked these for their flavour and chewy texture. 

Cherry Chip Oatmeal Cookies
1 1/2 cups flour
2 tsp baking soda
1/2 tsp salt
3/4 cup sugar
3/4 cup brown sugar, packed
3/4 cup butter, softened
2 eggs, large
2 tsp vanilla
3 cups rolled oats
1 cup dried tart cherries
1 cup chocolate chips

Preheat oven to 250 F.  In small bowl, whisk together flour, soda, and salt and set aside.
In a large bowl, cream butter and sugars.  Beat in eggs one at a time and then add in vanilla and mix in.  Stir in flour mixture. Stir in oats, dried cherries, and chocolate chips.  Drop dough by rounded spoonful, 2 inches apart on non stick cookie sheet.  Bake until tops are golden, 10 to 12 minutes.  Let sit a few moments on cookie sheet before transferring to wire rack to cool.

Monday, November 1, 2010

A Happy Hogwarts Halloween

Ever since Ike as been old enough.....I  have encouraged him to choose his Halloween costume, and I do my best to make something fitting his description and also something warm enough for the weather.  This year we were fortunate to have an absolutely beautiful Halloween night.  This worked out well for me since this is the first Halloween costume I've made for him that is not made out of polar fleece. 
Ike decided that he wanted to be a wizard for Halloween and I must admit that it took me a little while to clue in as to what he might think a wizard costume might look like compared with what I might come up with.  After a week of mulling over ideas in my head....it dawned on me that Ike's only 'experience' with wizards would be the Harry Potter movies.  Good thing I asked......because what he really wanted was a Hogwarts Student costume.  Vastly different than the shiny blue Merlin concoction that was brewing in my imagination.
This costume was really a fun one to make and is the first costume that I have bothered to buy a pattern to start with.  I purchased the McCalls 5952 pattern and found it to be extremely simple, a nice first time pattern with only 4 pieces. I modified it only slightly, taking 10 inches off the depth of the sleeve at the wrist, also making the back of the hood more 'pointy' and adding a wand pocket on the inside left side. I lined the hood with a wine coloured fabric similar to the Gryffindor colours from the later movies and ordered a Hogwarts crest from Ebay.  I found instructions here on making a Chinese Button Frog closure  to close the front of the robe.  I planned to remove the ties at the neck, but Ike decided he wanted to keep them as well.  Thinking ahead to next year, I made the robe a little on the long side.  The rest of the costume came together from thrift store finds and from our closet.  A mans medium grey V necked camel hair sweater to felt down to size, a boys white dress shirt, a tie of burgundy  and gold, and black pants finished off the outfit.  Two hot wash cycles with a few pairs of jeans, followed by a trip through the dryer made the mans medium camel hair sweater a little warmer and........just the right size!
Time permitting I decided to think about a Gryffindor scarf and DH thought about the wand.  The scarf took a bit of time fussing with the knitting machine to produce it and DH did the most marvelous job on the wand.  I think the whole wand construction took only 1/2 hour and cost $5 in parts, with parts to spare to make another.  It is constructed with an eleven inch section of oak dowel, a wooden handle for a pail, and a wooden ball.  DH drilled out the center hole of the pail handle and wooden ball using the drill press, to match the diameter of the dowel.  The dowel runs through the pail handle and into the wooden ball and is all glued together.  He also tapered the dowel slightly with sand paper on his drill press.  He then stained the working end of the wand and shellacked the handle end, lastly covering all in four coats of spray varnish.  I think Ike is likely to get a lot of use out of this one:)  After printing out the list of Harry Potter Spells from the internet......there was a lot of practicing!
We had a perfectly great Halloween here even though DH missed out as he had a course to attend out of town:(  Grampa, who is visiting, helped out lots with Ike's pumpkin carving and with the knitting machine too!

Thursday, October 28, 2010

Knitting more Falling Leaves

More beautiful fall weather continues here and in keeping with the fall leaves, here is another knitted project with fall leaves.  I found this pattern over at Purl Bee and decided that it would make a nice matching scarf for the foliage hat I talked about in the previous post.  The scarf took three balls (just over 600m) of  worsted weight yarn and took quite a few hours of knitting.  The pattern is quite wide, so I might have been able to save some yarn and some time by decreasing the width a little.  This scarf is on it's way to it's new home now in the US.  I would like to try this again with some more interesting yarn.  I. had not yet blocked the scarf before taking the picture and quite honestly I've never blocked a knitted item before.  I certainly have no recollection of my grandmother ever doing that.....but it think it really helps with the appearance .....so I guess I should figure that procedure out:)  How hard could it be??

Sunday, October 24, 2010

Back with a bit of Knitting

I'm back after a dropping off the grid for a breather.  The combination of a nasty cold, a sick kid, a new job, and too many commitments took a bit of a bite out of me.  I am now starting to dig out (if only a bit) from the mountain of things to do.  Aside from the obvious tasks for this time of year like getting Ike's Halloween costume ready, I've also been finishing up some knitting projects for some swaps I had signed up for before everything got too crazy here.  I decided to try a knitted hat swap, and after some searching, I ended up choosing to make a cute lace leaf pattern from Knitty.  I had my neighbour model it for the photo below.  There was one stitch I think might have done wrong.....so I'd like to try this one one more time.  I did really like the pattern and found it pretty easy to follow, and a pretty quick knit.  Much quicker than the next project I chose to make.....more about that later.  This leaf hat project took exactly 1/2 ball of Patons classic wool and was a very quick project that is perfect for a gift.  My neighbour has already hinted that she might like one for Christmas.

Wednesday, October 13, 2010

A Month of Cookies-Toasted Almond Cookies-13

Here is another slice cookie to try if you like almonds. They have a very strong almond flavour due to the toasting of the nuts.  I really liked these and will have to make them again.  For me this recipe was another winner!  The cookie itself a bit chewy....not at all like a shortbread type cookie.
Toasted Almond Cookies
2 1/2 cups slivered almonds, toasted
1 1/4 cup flour
1 cup cake flour
1 cup unsalted butter, softened
2 2/3 cup icing sugar
3/4 tsp salt
1 large egg, at room temperature

Toast almonds and set aside to cool.  Mix almonds with the two flours in a small bowl and set aside. Cream the butter and icing sugar and salt together until light and fluffy.  Add egg and stir to combine.  Add flour mixture gently with spoon...do not over mix.  Line a loaf pan with a long length of plastic wrap and press dough firmly into the pan.  Press top level and flat and bring sides of plastic wrap over to cover dough into a firm block.  Refrigerate dough for 3 hour.  Remove dough from pan and cut down the middle into two long lengths so you end up with 2 square lengths.  Cut each length into 1/4 inch thick 'square' cookies and set on a parchment lined sheet to bake.  bake at 400F for about 7 minutes or just until edges begin to turn golden.  Leave on baking sheet until cool enough to handle, then remove to a wire rack to cool completely

Tuesday, October 12, 2010

A Month of Cookies- Potato Chip Cookies-12

Here is a recipe that I have not made in many years....since before I met my DH as he had never heard of them.  They are pictured above on the left along side the last roll of Mexican Chocolate slice cookies.  I actually had to call my mom to get the recipe.....it's from an old Church cookbook and I knew that mom would be able to find her copy quicker than I could find mine.  Moms are dependable that way.  It was right where I remembered it to be in the cookie section and was pretty straight forward.  I have omitted the nuts so there won't be any problems sending them into school tomorrow.  This is a good recipe to have on hand that uses up egg yolks.  These cookies are a little different with some salt and some sweet notes and are generally well liked by kids and adults.....very few of either have been able to guess the secret ingredient.

Potato Chip Cookies
3/4 cup sugar
3/4 cup butter
1 1/2 cup flour
1 cup crushed potato chips (I have always used plain ripple)
1 egg yolk
1 tsp vanilla
3/4 cup walnuts, chopped (optional)

Cream the butter and sugar until fluffy.  Add in egg yolk and vanilla and mix.  Stir in flour and crushed chips and nuts.  Shape into 1 1/2 inch balls and press with fork to flatten slightly.  Bake at 350F for 10 minutes.  After a few minutes remove to cooling racks.

Monday, October 11, 2010

A Month of Cookies- Mexican Chocolate Icebox Cookies-11

It has been quite a while since I last made these cookies.  I did leave myself a note that these cookies were pretty good and I decided that today, I would try to confirm this assessment. (and I did)  I really do like the convenience of icebox cookies and also their sharply defined features. Their more controlled shape brings a bit more formality to their presentation.  They make a great addition to the holiday baking assortment both from their appearance and their bold colour and flavour. They are richly chocolate with an added punch from the pepper in the recipe.  If  that sounds like something you might like to try here is the recipe...

Mexican Chocolate Icebox Cookies
(adapted from the Maida Heatter Recipe)
1 3/4 cup flour
3/4 cup cocoa powder
1 /4 tsp salt
1/8 tsp black pepper
1/4 tsp cayene pepper
1 tsp cinnamon
3/4 cup softened butter
1 cup sugar
1 1/2 tsp vanilla
2 large eggs
Cream the sugar with the butter until light and fluffy.  Beat in the eggs, and vanilla. Sift the cocoa, flour, salt, cinnamon and peppers together and add to the creamed mixture.  Divide dough into two halves.  Shape each half into a long cylinder about 2 inches in diameter and wrap in waxed paper.  Set rolls in the fridge to firm up for an hour.  Dough can also be frozen at this time if wrapped very well with plastic wrap.  When ready to bake remove frozen rolls and allow to thaw enough to easily slice. Slice into 1/4 thick slices and place on a baking sheet.  Bake about 9-10 minutes at 350F.  Let cool a few moments on sheet before moving to a wire rack to continue cooling.

Sunday, October 10, 2010

A Month of Cookies-Chocolate Chip Pumpkin Cookies-10

OK I'm taking a cookie baking break today as I have already posted the recipe for this one before.....but I did want to include this one as it is a 'definite October bake' in my house!  So go on over here and check out the recipe as I can guarantee you will love it.  Today will be busy enough as I will be making a turkey dinner because it's Thanksgiving Day here in Canada.  Life here has been so extremely busy here with school and a new job starting up at the same time......I am enjoying the long weekend and the chance to slow down.  Thanksgiving is the perfect time to take pause and reflect on the important and positive things that we tend to overlook in the hasty scramble of everyday life.  So let's reflect and see if I can find 10 things to be thankful for...................
I am very thankful for,
  • a healthy and adorable family
  • friends who I consider family
  • really wonderful memories of those who are no longer here
  • people to turn to if I was really in trouble
  • a safe place to live with unlimited opportunities if choose to take them
  • a job that  fits around my life and takes me to interesting places and people
  • while I am probably not perfect....I really LIKE me
  • that I have all the things I need and probably too much of what I want as well
  • for all the multicultural exposure and interest in the world that comes from being Canadian
  • all that I've been able to experience to date....so much to see and do....so little time
Happy Thanksgiving Canada!

Saturday, October 9, 2010

A Month of Cookies-Chocolate Ginger Sparkles-9

Here's a cookie that has been on my to do list for quite some time.  In the cooler months I suddenly remember to make certain cookies that I don't make during the summer or spring.   I guess it must be the signs of fall, like leaves tumbling across the grass that make me think of pumpkins and spice and all things fall.  I believe this recipe was in a cookie collection magazine....either Fine Cooking or Martha....I cannot remember which now.....it has been written out with a note to try it and for the life of me I cannot find the magazine......it's around here somewhere.  Maybe I should clean up:)  In any event, it takes a good reliable recipe for Ginger sparkles and adds chocolate to the mix.  In my books...that's all good!  It's moist, chewy and has a bit of ginger bite and the sweetness of chocolate.

Chocolate Ginger Sparkles
1/2 cup butter softened
1/2 cup brown sugar
1/4 cup molasses
1 tbsp grated fresh ginger
1 tsp baking soda
1 1/4 tsp ginger
1 tsp cinnamon
1/4 tsp cloves
1/4 tsp nutmeg
1 tbsp cocoa powder
1 cup semi sweet chocolate chips
1 1/3 cup flour
1/4 cup white sugar, extra

Cream butter and brown sugar together until light and fluffy.  Beat in fresh ginger, & molasses.  Add dry spices and baking soda and cocoa powder and mix in.  Stir in flour and finally chocolate chips.  Chill dough in fridge at least 30 minutes.  Roll dough into 1 1/2 inch balls and roll in extra sugar.  Place on nonstick cookie sheet 2 inches apart.  Bake at 325 F for 10 minutes until surface of the cookies appear cracked.  Cool slightly on sheet before removing to cooling racks.

Friday, October 8, 2010

A Month of Cookies-Chewy Maple Cookies-8

With another PAC meeting at the school coming up, I had my eye open to find another recipe to try that would promise nut free deliciousness.  Even better that this recipe proved to be quite simple.....and even better that it combined two flavours I love....coconut and maple.  With no idea about how this one would turn out I gave it a go.  The end result was as you might expect....a moist and chewy cookie due to the coconut with a hint of maple....I really think the maple extract helps to boost the maple flavour.  Another one to make again sometime.
Chewy Maple Cookies
1/2 cup softened butter
1 cup brown sugar
1 egg
1/2 tsp maple extract
1/2 cup maple syrup
2 tsp baking powder
1 3/4 cup flour
1 cup shredded coconut
Cream together the sugar and butter until fluffy.  Add in egg, vanilla, syrup, and baking powder and mix in.  Stir in flour and finally the coconut.  Chill dough in the fridge for 1 hour before dropping by rounded tsp onto a non stick baking sheet.  Bake at 375F for 8 minutes.  Cool on sheet a few minutes before moving to a cooling rack.

Thursday, October 7, 2010

A Month of Cookies-Lemon Dimples- 7

With a name like Lemon Dimples....how could you not try these.  I really love lemon curd and it just so happened that I had a jar sitting in my pantry just waiting to be used up.  So when I chanced upon this recipe over at the Woman's Day site, I decided that I had to try it.  The cookie dough, as promised, was extremely quick to mix up, with the only time consuming part being the 1 hour chilling time.  No worries there.  I did not have any lemons laying around though so I did make a little substitution from the original recipe which called for lemon zest.  For how quickly these baked up....I will have to make them again........because I loved them.  I loved their lemony deliciousness, and I love that their flavour is a little unusual as far as normal cookie recipes go.  If you'd like to try them, this is what I did....and don't skimp on the filling.....make the dent for the filling nice and large and fill it up.  I found that the cookies did not spread too much for me during baking, and no filling spilled out.  If you love lemon.....you might just love these too!
Lemon Dimples 
(Adapted from Woman's Day Recipe)
3/4 cup softened butter
1/2 cup icing sugar (confectioners sugar)
1/4 cup white sugar
1 large egg
1 tbsp lemon juice
1 tsp lemon extract
1 tsp baking powder
1 tbsp orange juice
2 cups flour
1 cup lemon curd for filling
Cream the butter and both sugars together until light and fluffy.  Add egg, juices, lemon extract, and stir in.  Mix in baking powder and flour and set aside to chill in the fridge for 1 hour.  Roll 1 tbsp of dough into a ball and press center to make a dent to hold the filling.  Place balls on parchment lines sheets, 2 inches apart.  Pipe in about 1 tsp of lemon curd to fill each dent.  (Use a sandwich bag with the corner cut off for piping) Bake at 350 for 15 minutes or until the edges begin to colour.  Cool on the baking sheet before removing.  Sprinkle with extra icing sugar to decorate.

Wednesday, October 6, 2010

A Month of Cookies- Mincemeat Cookies-6

Another great soft cookie that really surprised me.  With the large amount of mincemeat that I canned up this year......I began thinking about ways in which to use it up other that tarts.  This recipe came to mind and I am happy to say I gave it a try.  Soft cakey cookies have never been my favourites.....but as my list of soft cookies that I like increases........I may have to change my way of thinking:) This cookie is moist and cakey and has a nice depth of spice flavouring.  These cookies get two thumbs up from Ike too, who has eaten more than enough to form an opinion.  Give this one a try if you  have some mincemeat to use up.

Mincemeat Cookies

1 1/2 cups brown sugar
1 cup butter
1 egg
2 cups mincemeat
3 1/4 cup flour
1/4 tsp salt
1 1/2 tsp baking soda
1/2 tsp salt
1/2 tsp cloves
1/2 tsp cinnamon
1/2 tsp allspice

Preheat oven to 375 F.  Cream butter and sugar.  Add egg and mincemeat and stir to combine.  Sift dry together and stir in to dough.  Drop by teaspoonful on cookie sheet and bake about 10 minutes, until the cookies begin to show golden around the edges.  Fresh from the oven they have a bit of a crisp exterior, but this will soften as they sit together in the cookie jar.

Tuesday, October 5, 2010

A Month of Cookies- Zucchini Cookies 5

I'm still at it here, keeping my fingers crossed that I can sustain the pace.  Here we are with cookie number 5 which is a zucchini spice cookie.  Now this recipe comes from a very nice friend who had an over abundance of zucchini.  Zucchini seems to be one of those things that people are always looking for recipes to use them up.  Well, it turns out that this recipe makes a very nice soft  and mildly spiced cookie with optional nuts which can be left out if nut allergies are an issue for you.
Zucchini cookies
1 cup margarine or butter
2 cups sugar
2 eggs
4 cups flour
2 tsp baking soda
2 tsp cinnamon
1 tsp salt
2 cups chocolate chips
1 cup chopped walnuts ( optional )
Cream, butter and sugar.  Mix in eggs.  Mix flour, soda, cinnamon and salt together and stir in to batter.  Stir in chocolate chips and nuts if desired.  Drop onto greased cookie sheet by teaspoonful, and bake 350 degrees for 15 min or until cookies are firmed up in the center and beginning to brown on the edges.

makes 5 dozen cookies

Monday, October 4, 2010

A Month of Cookies-Cherry Chip Ribbon Cookies-4

Another slice and bake......I just cannot say enough about the ease and convenience of icebox cookies.  This one has the extra step of layering the dough to give the cookie some pretty stripes.  A tiny bit more effort for a little more cookie bling.  This is a nice tasty cookie, and I love the way it looks too.  It's nice to have a log of these in the freezer in preparation for unexpected company!  Let them thaw until you can slice them.....and you are ready to go.  For Christmas you could even throw in some green cherries for a more festive look.

Cherry Chip Ribbon Cookies
1 cup softened butter or margarine
1 cup sugar
1 egg
2 Tbsp milk
1 tsp vanilla
3 cups flour
pinch of salt
1 1/2 tsp baking powder
100g bitter sweet chocolate or semi sweet (1/2 cup chips) or 3 oz, to be melted
1/2 cup maraschino cherries, drained, blotted to remove excess juice and chopped
1/4 cup chocolate chips extra

Cream the butter and sugar, add egg, milk, vanilla and a pinch of salt.  Mix until incorporated.  Beat in baking powder, then mix in flour until dough is well blended.  Divide dough in half and place in two separate bowls.  Add the melted chocolate to one bowl and mix in evenly.  Add the cherries and chocolate chips to the other bowl and mix until well distributed.  You may want to add another tablespoon of flour to the cherry dough if it becomes too wet from any cherry juice.
Line a 3X8 loaf pan with plastic wrap.  Take 1/2 of the chocolate dough and pat it down into an even layer in the bottom of the pan. Take 1/2 of the cherry dough and pat it down on top of the chocolate layer making it as even as possible.  Repeat with the remaining chocolate dough and then with the last of the cherry dough. Place loaf pan in fridge to firm up the dough, for a few hours or over night.
Preheat oven to 375F.  Once the dough is cool enough to slice, remove it from the pan and remove the wrapping.  Slice a 1/4 inch slice of the end of the load and cut that slice into 3 equal pieces.  Repeat with remaining dough. Place on nonstick cookie sheet or parchment lined baking sheet  with 1 1/2 inches between each cookie and bake 8-10 minutes or until the edges of the cookies begin to colour.

Sunday, October 3, 2010

A Month of Cookies - Buckwheat Cocoa Nib Butter Cookies-3

Here's another slice and bake or Icebox cookie recipe that I was tempted to try.  I read quite a few bloggers that had given it great reviews, so I decided to give it a try as well.  The recipe if from Alice Medrich's Pure Dessert cook book and is for Buckwheat butter cookies with cocoa nibs.  Now I could only find cocoa nibs here in the health food store and I could only find raw ones....so I roasted them myself at home in a 250F oven for 20 minutes.  It seems that raw cocoa nibs have a longer shelf life anyway.......so maybe this will work out better for me anyway.  If you'd like to try it as well.....here is the recipe. With  a little more effort you can roll and cut these cookies into pretty shapes.  I am very much enjoying the look of them though......and the convenience factor of the whole refrigerator cookie thing is very high......so I've elected to roll mine into logs to cool and slice......to each his own!
Buckwheat Cocoa Nib Butter Cookies
adapted from Alice Medrich's Pure Dessert
  • 1 1/2 cups flour
  • 3/4 cup buckwheat flour
  • 1 cup butter softened
  • 2/3 cup sugar
  • 1/3 cup roasted cocoa nibs
  • 2 tsp vanilla extract
  • pinch of salt
In a bowl mix the flours.  In a stand mixer or mixing bowl, cream the butter and sugar and salt until creamy. Now add the nibs and vanilla and beat to incorporate.  Add the flours mixing until incorparated.  You will know it is done when the dough pulls away from the sides of the mixing bowl, is moistened and slightly darkened.  Form into a 2 1/2 inch diameter log, wrap in waxed paper and let set in the fridge to firm up for several hours or overnight.  Preheat oven to 350F. Slice dough into 1/4 inch thick slices and place on parchment lined cookie sheets with  1 1/2 inches between cookies.  Bake until the edges just begin to colour, about 12-14 minutes, rotating cookie sheets halfway through if necessary.  Transfer to wire racks to cool.  Cool before storing in tightlt sealed container.  Cookies are best the second day. On the day of baking some say that the buckwheat flavour is too pronounced.  These are a nice butter cookie that are a bit different, and have a distinct nutty cocoa flavour.  These are very nice with tea or coffee.

Saturday, October 2, 2010

A Month of Cookies - Raspberry & White Chocolate Cookies-2

Here is a cookie that my neighbour shared with me for Christmas baking over the last two years.  I quite liked this one and it kept well too.  It is sweet and chewy.... kind of like a sugar cookie except that it is a drop cookie and the addition of raspberry jam could only be a good thing right?  You should totally try this one!

Raspberry & White Chocolate Cookies

8 oz white chocolate, chopped or chips ( melted and set aside)
1/2 cup soft butter
1 cup sugar
1 tsp baking soda
1/4 tsp salt
2 eggs
2 3/4 cup flour

Raspberry Topping
1/2 cup raspberry jam
3 oz white chocolate, to melt
1/2 tsp shortening (to thin the chocolate)

Preheat oven to 375F.  Melt the 8 oz of the white chocolate over a bowl of hot water or in the microwave and set aside to cool.  In a large bowl, cream the butter and sugar.  Then add the baking soda, and salt and mix until incorporated.  Beat in the eggs and melted chocolate.  Beat in flour with mixer or by hand...dough will be stiff.  Drop by rounded teaspoonful onto nonstick cookie sheets and flatten slightly.  I used my cookie scoop to make them uniform in size.  Bake 7-10 minutes until edges just begin to brown. Remove from oven and cool 2 minutes on cookie sheets, then move to wire racks to finish cooling.  Melt jam , and spoon a small amount (1/2tsp) on top of each cookie.  Melt the 3 oz of remaining white chocolate and 1/2 tsp shortening and stir until smooth.  Transfer welted chocolate to a sandwich bag and cut a corner off to use like a piping bag.  Drizzle melted chocolate in a lacy pattern over the tops of the cookies. Serve once the chocolate is set.

Friday, October 1, 2010

A Month of Cookies - Dutch Icebox Cookies-1


This will be an abmitious effort me.......One cookie recipe each day for a month.  I'm pretty sure I don't have 30 cookie recipes that I routinely make so this will be an opportunity to try some new ones and maybe find a few new favourites.  Let's just see how far I get.  To start out with, I decided to try something new.  This recipe has been sitting in my binder for several years now and was at one time taken from the internet, but at this point I'm not sure where from.  Doesn't the name 'Icebox' cookie sound old fashioned....in a gramma's kitchen, vintagey cool way???  I promised Ike some new cookies the other day and these are them!  The recipe was very easy, quick, and I like the fact that you can be all Martha and have this dough waiting in the fridge or freezer waiting and ready to go.  Don't I feel all prepared now!  I also like how uniform each cookie looks.  Perfectly presentable and perfect for gifting.......I have it on good authority that consumables and food items make a suitable teachers gift.  After this batch, I am eager to try another 'Icebox' cookie recipe.  These are mildly spicy and you can bake them a little longer to have them crisp all the way through or bake them just until browning at the edges to have a soft center.

Dutch Spice Icebox Cookies
1 cup butter
2 cups white sugar
1 cup sour cream
1 1/2 tsp ground cinnamon
2 tsp ground nutmeg
3/4 tsp ground cloves
1 tsp baking soda
1/2 tsp salt
4 cups flour
1/4 chopped nuts, optional

Method
Cream the butter and sugar until creamy, then add sour cream and mix until incorporated.  Mix in spices and finally mix in all flour.  Add nuts if desired. Divided dough in half and form each half into a log about 3 inches  in diameter and about a foot long.  Place on waxed paper and roll up in the waxed paper sealing the ends and place in refrigerator long enough for the dough to firm up....or overnight.  When ready to bake...preheat oven to 375F....slice dough into 1/4 inch thick rounds and bake 7-10 minutes watching and removing the cookies when they begin to brown at the edges.  For a more crisp cookie.....slice a bit thinner and bake until browned a bit more.  Remove cookies to a wire rack to cool.  Rolls of dough can be frozen until needed.....and then you'll look just like Martha, won't you?

Monday, September 27, 2010

September's Daring Bears

When you talk about September in my neighbourhood....chances are good bears will enter the conversation.  Just last week while I was away there was a mother and cub (black bears) wandering from yard to yard looking for tasty apples and berries to see them through the long winter.  As the bears become so  'Daring' that noisy neighbourhood activity no longer frightens them away......this can become a problem with sad consequences for the bears.  With all the bear activity around here, it seemed appropriate as I pawed through my cookie cutter collection that I should choose the bear shaped one of this month's challenge with the Daring Bakers.
The September 2010 Daring Bakers’ challenge was hosted by Mandy of “What the Fruitcake?!” Mandy challenged everyone to make Decorated Sugar Cookies based on recipes from Peggy Porschen and The Joy of Baking.
Since I am out of town for a good chunk of the coming week again....I decided to bake up just a few of the batch and to store the remaining dough for rolling when I return home.  As a modification I used rum flavouring and added 1/4 tsp ground fresh nutmeg to the recipe below.  I am leaving these little bear cookies for Ike to have for lunch while I am away so I will have to update with his thoughts on their flavour.  The dough was very easy to work with and I can comment that the dough was quite tasty too:)
Basic Sugar Cookies:
Makes Approximately 36x 10cm / 4" Cookies
200g / 7oz / ½ cup + 6 Tbsp Unsalted Butter, at room temperature
400g / 14oz / 3 cups + 3 Tbsp All Purpose / Plain Flour
200g / 7oz / 1 cup Caster Sugar / Superfine Sugar
1 Large Egg, lightly beaten
5ml / 1 tsp Vanilla Extract / Or seeds from 1 vanilla bean
Directions
• Cream together the butter, sugar and any flavourings you’re using. Beat until just becoming
creamy in texture.
Tip: Don’t over mix otherwise you’ll incorporate too much air and the cookies will spread during
baking, losing their shape.

• Beat in the egg until well combined, make sure to scrape down the sides of the bowl.
Add the sifted flour and mix on low until a non sticky dough forms.
Tip: I don’t have a stand mixer so I find it easier to switch to dough hooks at this stage to avoid
flour flying everywhere.

• Knead into a ball and divide into 2 or 3 pieces.
• Roll out each portion between parchment paper to a thickness of about 5mm/1/5 inch (0.2 inch)
• Refrigerate for a minimum of 30mins.
Tip: Recipes commonly just wrap the whole ball of dough in clingwrap and then refrigerate it for an
hour or overnight, but by rolling the dough between parchment, this shortens the chilling time and
then it’s also been rolled out while still soft making it easier and quicker.

• Once chilled, peel off parchment and place dough on a lightly floured surface.
• Cut out shapes with cookie cutters or a sharp knife.
• Arrange shapes on parchment lined baking sheets and refrigerate for another 30mins to an hour.
Tip: It’s very important you chill them again otherwise they’ll spread while baking.
• Re-roll scraps and follow the above process until all scraps are used up.
• Preheat oven to 180°C (160°C Fan Assisted) / 350°F / Gas Mark 4.
• Bake until golden around the edges, about 8-15mins depending on the size of the cookies.
Tip: Bake same sized cookies together otherwise mixing smaller with larger cookies could result in
some cookies being baked before others are done.

Tip: Rotate baking sheets half way through baking if your oven bakes unevenly.
• Leave to cool on cooling racks.
• Once completely cooled, decorate as desired.
Tip: If wrapped in tinfoil/cling wrap or kept in airtight containers in a cool place, un-decorated
cookies can last up to a month.